DIY Raspberry as HomeKit Device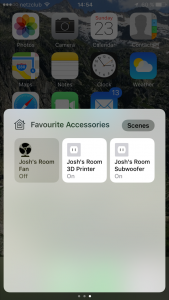

Starting with iOS 10 Apple introduced the Home feature which allows you to control specific devices remotely. Either every lamp and every outlet is connected to your network individually or one device bundles the others through a different protocol.
I love reverse engineering and so this awesome Project HAPServer by KhaosT. It simply turns your Linux computer into a HomeKit Device. It is based on the widely used NodeJS platform and you can create your own, so-called accessories, in NodeJS.
My Setup
- Three 433 MHz Remote Controlled Outlets ~ 15€
- Raspberry Pi 2 ~ 25€
- 433 MHz Transmitter ~ 1€
The Code
I used this NodeJS plugin to control the outlets.
Then used the default Fake_Outlet.accessory as a skeleton for all my accessories.
This is an excerpt of the essential code I use. I wrote the function tristateToDecimal() to convert the states of the DIP-Switches and input them directly.
// RF Setup
var rpi433 = require('rpi-433');

rfEmitter = rpi433.emitter({pin: 4, pulseLength: 422});

function tristateToDecimal(string) {
        string = string.replace(/0/g, "00");
        string = string.replace(/F/g, "01");
        var decimal = parseInt(string, 2);
        return decimal;
}

var SUBWOOFER = {
  powerOn: false,
  setPowerOn: function(on) {
    console.log("Turning the Subwoofer %s!", on ? "on" : "off");
    if (on) {
                rfEmitter.sendCode(tristateToDecimal("000000F0FFF0F"));
                SUBWOOFER.powerOn = on;
        }
    else {
                rfEmitter.sendCode(tristateToDecimal("000000F0FFFF0"));
                SUBWOOFER.powerOn = false;
   };

  },
  identify: function() {
    console.log("Identify the Subwoofer!");
  }
}